
This is (a very long due) part two of a collaboration between EMVP Khurram Khan and me on integrating EPiServer with Microsoft Azure Logic Apps. If you haven't read part 1 I really recommend to check out part 1 (by Khurram) first to find out what Logic Apps is and how you can prepare your project to get started.
After setting up your project you can start creating Logic Apps that leverages the EPiServer Service API to interact with data stored in EPiServer. In my example below, I will show you how you can use Azure Logic Apps to reward shoppers a coupon code when their total order value exceeds X. We have demoed the same example at the EPiServer Close-up 2017 in Stockholm, Sweden and EPiServer Ascend 2018 in London, UK.
Setting up the trigger
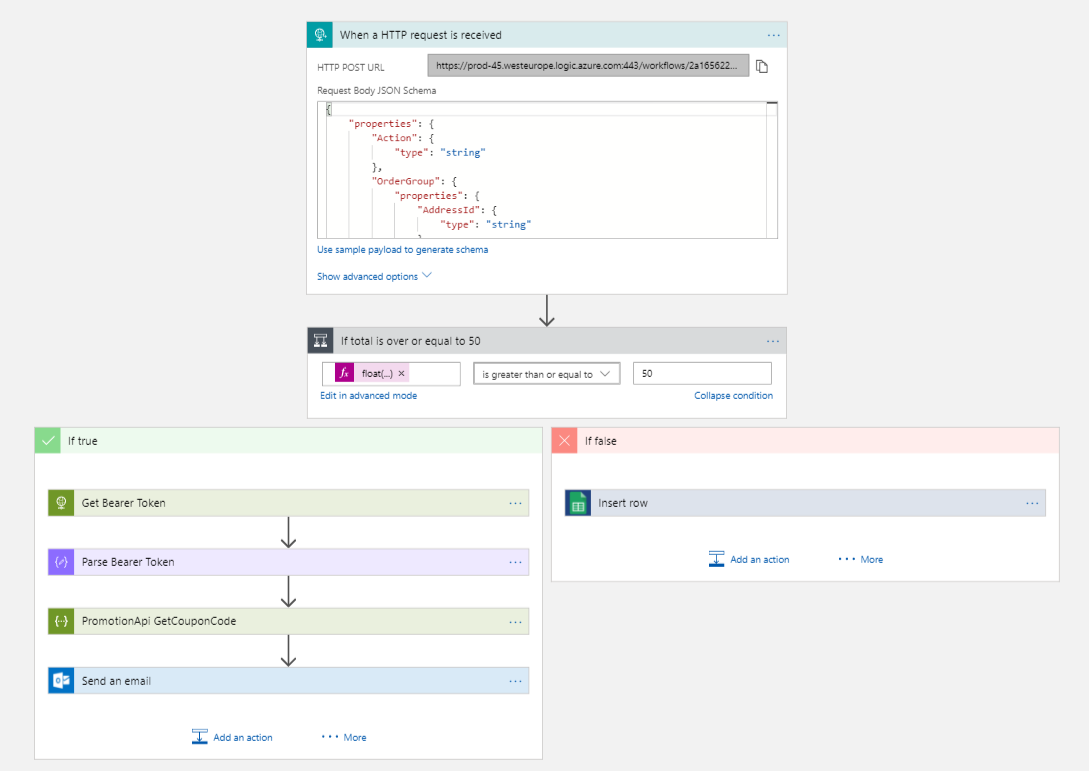
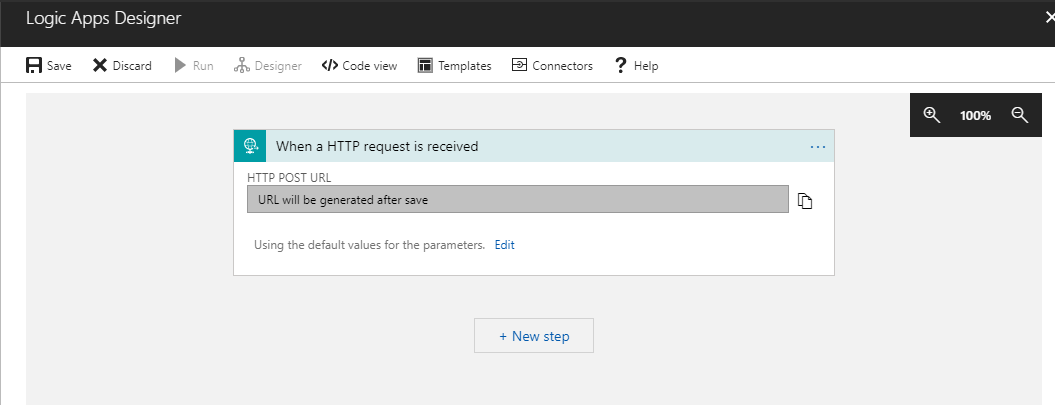
In part 1 Khurram explained he set up a webhook to call EPiServer Logic Apps. To receive this webhook in Azure Logic Apps we will need to set up a "When a HTTP request is received" trigger. After you added the trigger save the Logic App and configure the URL that got generated in EPiServer so the webhook can call it.
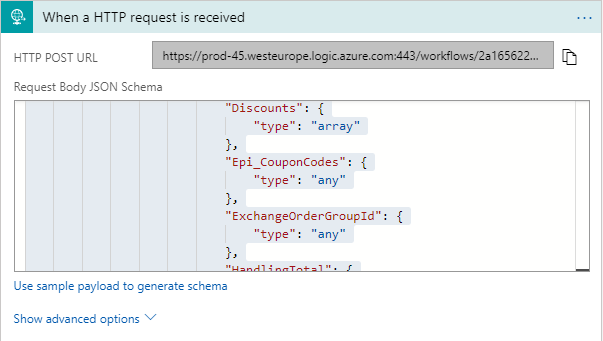
The next step is to tell Logic Apps what the request will look like. This can be done by configuring a JSON schema for your order. The easiest way to do is to grab yourself a JSON serialized order and using the built-in tool to use this sample to generate a schema. You can do this by clicking the little edit link on the bottom of your trigger and then clicking the "Use sample payload to generate schema" link. Paste you JSON and click done.
Using the order values
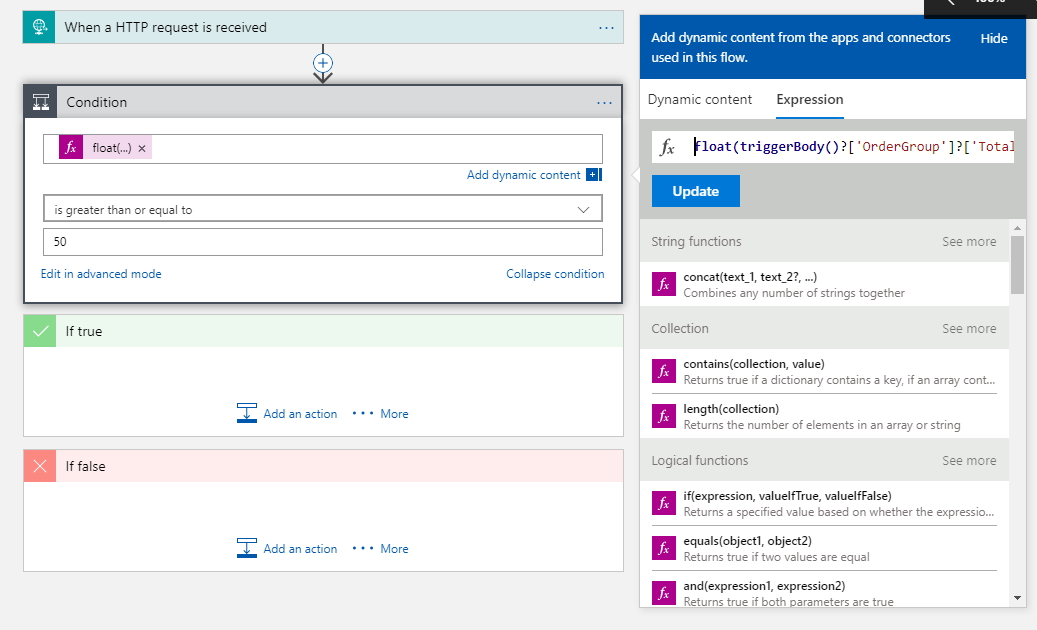
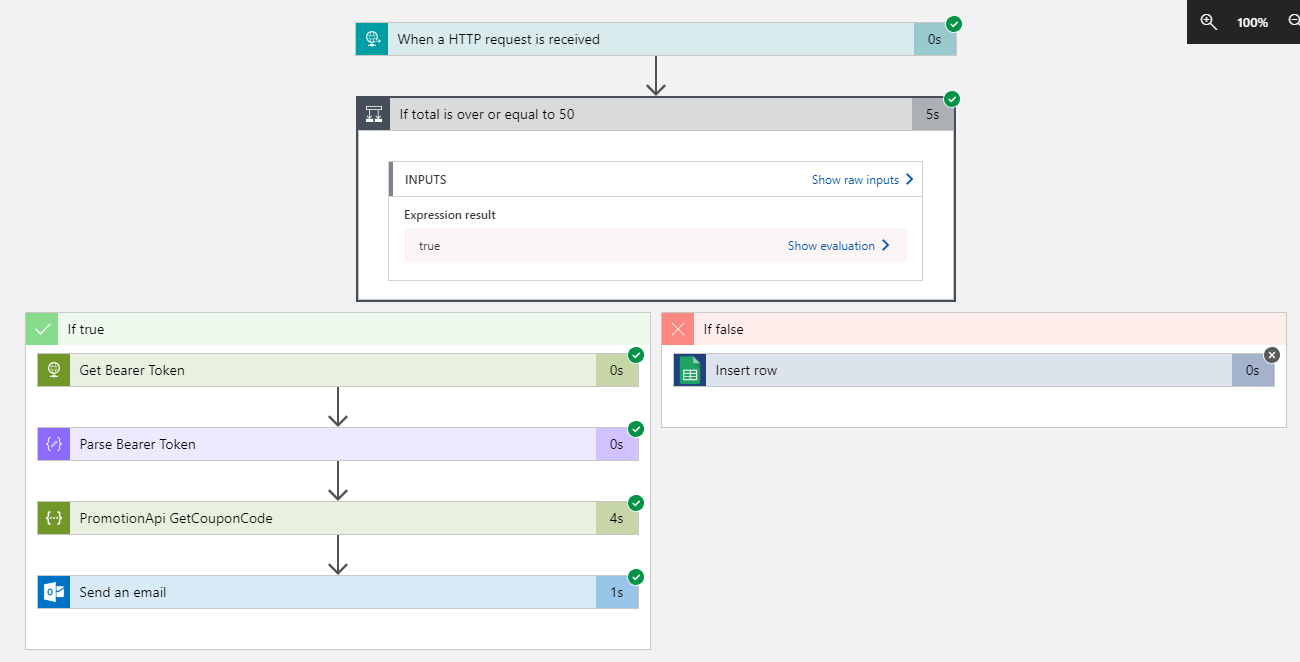
We can use the order values to check if the order is over 50 euro and send the customer his coupon. Click the new step button and click "Add a condition". A new if else statement will be created and you will see the Dynamic content window
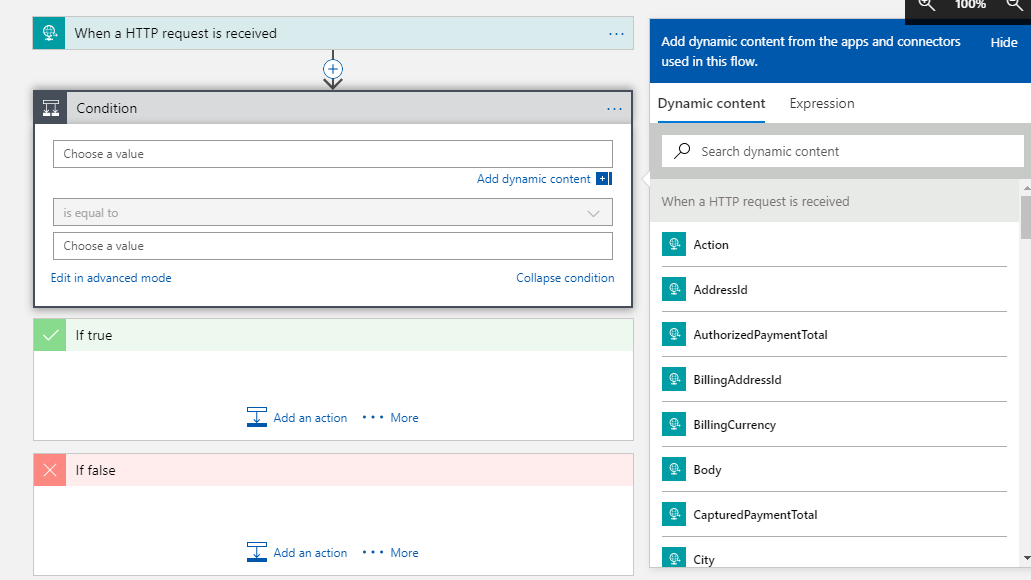
The dynamic content window will contain all the order properties. It knows about these properties because we generated an order schema in the previous step. In the dynamic content window, search for the "Total" Property and select the second "Total" property that shows up.
There are two Total properties because both the OrderForm.Total and OrderGroup.Total show. Logic Apps currently has no nice way of showing this in the dynamic content window. If you select the OrderForm.Total the Logic App will nest your condition in a foreach loop (as there is a 1-many relation between OrderGroup and OrderForm).
If you click on the operation dropdown you will see that there are no numeric operations. This is because decimals get serialized to strings in JSON (for precision) to enable numeric operations we need to cast the value to a float (if possible). Click the left operand again and open the Expressions tab in the Dynamic Content window that pops up. Select the float(value) option under Conversion functions, switch back to the Dynamic Content Window and click the Total property. You will see that the function is generated that converts the Total property to a float: float(triggerBody()?['OrderGroup']?['Total']).
Now select the "is greater than or equal to" operation and fill out the minimum order value in the right operand. For this example, we will use 50.
Authenticating to Service API
To get your data from Service API you will need to authenticate. In the "If true" block add a new action You do this by posting to your /episerverapi/token endpoint and with grant_type=password&username=user%40example.com&password=MySecretPassw0rd! in the body. Deserialize the response using the Parse JSON action to retrieve the bearer token. The response uses the following schema:
{
    "properties": {
        "access_token": {
            "type": "string"
        },
        "expires_in": {
            "type": "number"
        },
        "token_type": {
            "type": "string"
        }
    },
    "type": "object"
}
Ideally, we would combine these two steps in a Azure Function so we can combine these two actions to reduce complexity (post coming soon).
Even better would be that EPiServer would partner with Microsoft in making EPiServer available in Logic Apps where we would only have to configure the endpoint of our EPiServer installation and do some authentication in the Logic Apps UI that we would do for any other integration. Something like this would also open the door to maybe interacting with their other products like campaign, reach, perform and insight or their headless API.
Interacting with the Service API
The next step would be interacting with the Service API, to make your life easier I recommend installing Swashbuckle (.NET implementation for adding Swagger/Swashbuckle to your Web API project). Also modify the Swashbuckle configuration to expose the Authorization header so we can easily pass the bearer token we generated earlier. See this post for more information.
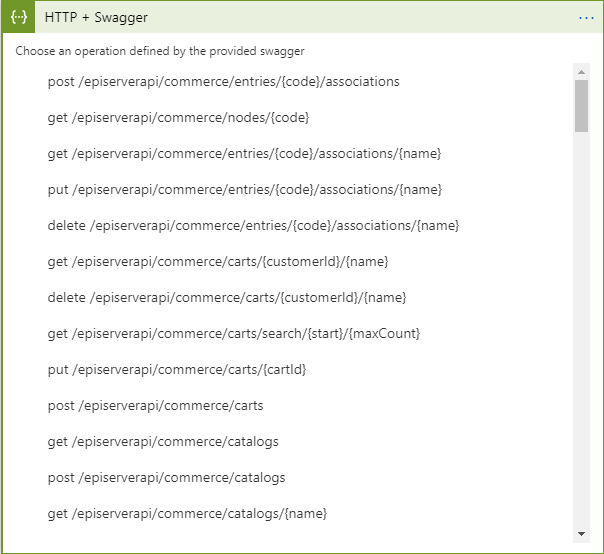
After we have our swagger documentation in place it's time to point logic apps to this documentation so it can discover the different API endpoints. Add a new action, and search for HTTP, now scroll down and find the "HTTP - HTTP + Swagger" entry in the list. Select it and fill out the URL of your endpoint (this is usually something like /swagger/docs/v1). Make sure the URL is HTTPS. Now click OK and Azure Logic Apps will present you with a list of all the different actions that are exposed by your (Service) API.
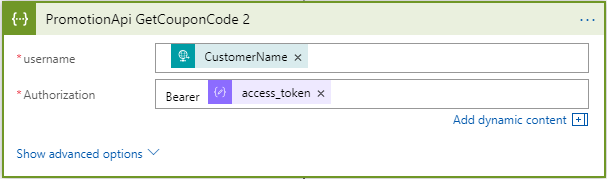
If you select one you will be presented with a bunch of fields you can fill out using the dynamic content and functions that we did earlier. If you went along with the post by Khurram you can now select the promotion API and map the CustomerName to the username field and map the Bearer token to the authorization field like this: "Bearer [acces_token]" (without the square brackets)
Integrating with third party software
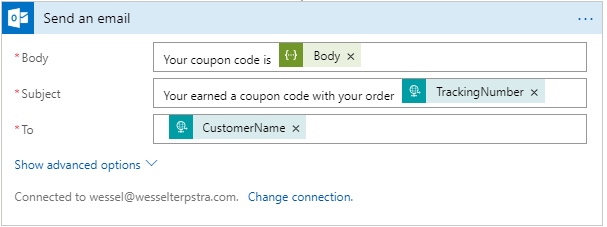
Finally, we can send the coupon code to our client through one of the third parties. Because I personally use office 365 i used the Outlook channel, but you can use SendGrid (recommended for production use) or gmail as well. Add a new action, select the email vendor you like to use. Authenticate to the service in the Logic Apps UI using your own credentials and map the dynamic data to the correct fields. If you are following along with the promotion API, you can retrieve the coupon code from the "Body" dynamic content property.
Trying it out and debugging
So now try it out, place an eligible order in your shop and let’s see if the Logic App has been triggered. Close out of the browser and scroll down to the Runs history panel in the main window. If it's empty, make sure you have configured your trigger endpoint correctly and step through your shop with the debugger to make sure your endpoint is called.
If there is an entry and it's successful, well done! You should have received an email with your coupon code.
If it's not, click the entry in the list and an editor-like window will open. Check the green checkmarks / red crosses for which action failed. If you want to know more about the data that got passed in to the trigger or actions just click it and you can see all the data that went through your logic app.
Happy click-click-click automating!